Create the Movie
From Longview ISD Technology Wiki
Saving the Project
- 1. Click the Save Project button.
- 2. Navigate to the location where you want the project saved.
- 3. Use the scroll bar on the left to find the desired location.
-
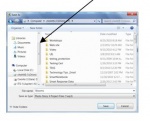
- 4. Type in an appropriate file name.
- 5. Save as type should be Photo Story 3 Project Files (*.wp3).
- 6. Click save. The following window appears.
-
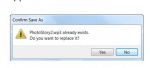
- 7. Click yes if you want it replaced. The project is saved over the top of the previous project that had the same name.
- 8. You must save a project for your story to be able to edit it later.
- 9. By default, the project for your story is saved in your my videos folder on the hard drive of the computer.
Choosing a Purpose
-
-
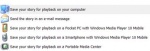
- 1. Choose the appropriate purpose for your presentation. In most cases, choose Save your story for playback on your computer.
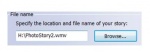
- 2. Next, you must specify the location and file name of your story. This is where the wmv (movie) file will be saved when the movie is rendered. Click the browse button and navigate to the desired location.
-
- 3. Under Quality settings, click settings if you want to particular changes.
-

Rendering
- 1. When you click the next button. The program renders the project into a movie file(wmv).
- 2. It will move through several steps where it builds the movie. Be patient!!! It could take several minutes for the movie to render. The more pictures, narration, and background music you have the longer it takes to render.
-

- 3. After the computer completes the rendering, you will see the following screen. You may view your story, create another story, save the project, or exit.


