Add Titles
From Longview ISD Technology Wiki
General Title Information
By default, when you add a title to a picture, the picture is static. No motion, or panning and zooming effects are applied to pictures with titles. To add panning and zooming effects to pictures with titles, you must customize the motion for the picture. For more information about customizing motion, see customizing motion and selecting transitions.( Photo Story: Advanced Features )
You can also apply effects to pictures that change the appearance of the picture. For example, you might want to apply the Black and White effect to every picture that introduces a new section of your story. Using an effect can also make a title on a picture stand out more.( Photo Story: Advanced Features )
-
- The title can have a maximum of 1,024 characters. The text wraps in the picture preview area.
-
- If you want to manually control which text appears on each line, separate lines by pressing the ENTER key.
-
- You can edit your pictures on any page in Photo Story on which the film strip appears by right-clicking a picture, pointing to Edit, and then clicking the option you want.
Adding Titles to Pictures
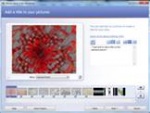
- 1. On the Add a title to your pictures page, click a picture on the filmstrip, and then type the title.
- 2. If you want to change the appearance or location of the title, do the following:
- a. To change the font, click the Select Font button, and then select the font type, style, size, effects, color, and script you want to use.

- b. To change the horizontal alignment of the text, click the Align Left button, Center Horizontally button, or Align Right button.

- c. To move the title up or down on the page, click the Align Top button, Center Vertically button, or Align Bottom button. By default, the title appears in the center of the picture.

- a. To change the font, click the Select Font button, and then select the font type, style, size, effects, color, and script you want to use.
- 3. As you make changes, you can view them in the Preview area on the left side of the page.
- 4. Click next. If you want to return to the previous page, click back.
- 5. You can click next without adding titles to any of your pictures.
Saving Project
- 1. You can save a project for your story at any time while working on the story by clicking the Save Project button.
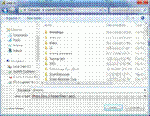
- 2. In the Save As dialog box, type the name of the project. You must save a project for your story to be able to edit it later. Projects created by using Photo Story 3 for Windows must use a .wp3 file name extension. By default, the project for your story is saved in your My Videos folder.
- 3. If you are at school, navigate to your H drive and save the project there.


