Virtual Machine/Thin Client FAQs
From Longview ISD Technology Wiki
Contents |
What Is a Virtual Machine (Samsung)
Using a virtual machine/thin client is basically the same as using a desktop or laptop computer, but, there are a few differences.

- A the Samsung is used to access the virtual machine, but, the "machine" is not physically located in your room.
- Any Samsung can be used to access a user's virtual machine.
- There are two basic images: one for Staff and another for students.
Virtual Machine Hookup
- Cable Connections
-
- Remove the key at the base of the thin client. (May not have one.)
- Raise the machine.
- Rotate the machine sideways for ease of access to the connections.
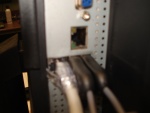
- Plug in the network cable, mouse & keyboard – in a straight line as pictured.
- Power Plug
-
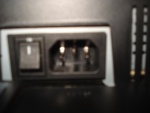
- Plug the power cable snugly into the three pronged hole located on the bottom of the machine.
- The toggle switch should be in the ON position (as shown).
- Rotate the monitor back to the correct position, making sure the power plug is not pulled out.
- Speakers
-
- Speaker Bar – Is attached either on top of the machine or is placed under the machine.
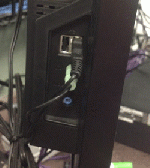
- Speaker wires - Plug them into the side of the machine.
- Green audio plug into green hole
- Black USB plug into one of the USB ports located close to the green audio plug.
- Flashdrives
An extra USB plug is available on the side of the machine where the speakers plug in. It can be used for a flash drive.
Remember: Remove the flash drive before you Log Off.
- Headset
You may attach a headset to a thin client machine. (if desired & available)
-
- Unplug the green audio plug from the side of the machine.
- Plug the headset connection into the green audio hole. The headset must have a small mini-plug connector.
Virtual Machine Configuration
- Click the word OPTIONS in the upper left corner of the screen.
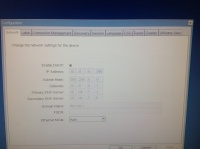
- Under Configuration a window will come up which will have several tabs across the top.
- Main tabs to check for configuration: Network Tab, VMWare View Tab, Discovery Tab
Important: if you need to make any changes in the configuration you will need to Reset or Restart the computer. Do whatever it says to do.
- Setting for Network Tab
-
- Enable DHCP: Check.
- IP Address: Will vary. Example: 10.8.4.245
- Subnet Mask: 255.255.0.0
- Gateway: Will vary. Example: 10.8.0.1
- Primary DNS Server: 10.40.7.2
- Secondary DNS Server: 10.40.7.6
- Domain Name: lisd.org
- FQDN: blank
- Ethernet Mode: Auto
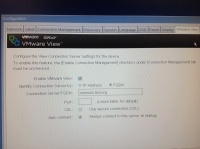
- Settings for VMWare Tab
-
- Enable VMware View:
- Identity connection Server by: FQDN
- Connection Server FQDN: nemesis.lisd.org
- Port: leave blank
- SSL: no check
- Auto connect: check
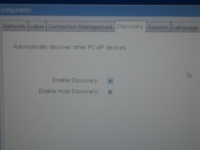
- Settings for Discovery Tab
- Enable Discovery: check
- Enable Host discovery: check
Staff Virtual Machine
Staff members “grab” the same virtual machine (VM/Samsung/Thin Client) each time they log off and back on. Staff members working from their Virtual Machine should always save work to their H:drive.
The Save dialog box will include something like: jdoe$ (\\Orion) (H:).
Staff members can:
- Set up the Internet Explorer home page and/or Google Chrome home page.
- Set their start menu to look a specific way and can add programs to it.
- Ask technology staff to assign specific printers to their Virtual Machine. (Staff members should not attempt to install a printer.)
If a staff VM becomes unresponsive the technology department may solve this problem by deleting the current VM machine assigned to the staff member and assigning a new virtual machine.
This will:
- Delete the staff VM
- Delete the Favorites (web pages) saved in IE or Google Chrome (unless the staff member is logged into Google Chrome browser prior to saving to Favorites).
- Delete any files saved to the Desktop, My Documents folder, and Downloads folder.
Warning
Files saved to a path that includes: ▸Doe, Jane ▸Downloads, will be deleted from the staff member's unresponsive Virtual Machine when technology assigns the staff member a new Virtual Machine.
Setting Staff Default Printer
On staff thin clients, each staff member must select your own default printer.
- Click the Start button and then choose the printer icon to view the printer choices you have.
- Right-click on the printer you want to set as you default printer and choose “Set as Default Printer”.
If you need a printer added to your printer choices, contact your ITS.
Basics for Students
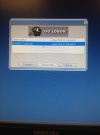
- Logging On
- Enter your ID # and password.
- Click Connect.
- Login Problems
-
- Make sure there is not a space in front of the 1st letter of your username.
- Error message, “Failed to authenticate” – Type the password again.
- Error message, “Bad Username or Password” – Check for spelling errors & type the password again.
Call the Technology Help Desk if you still cannot login. 903-446-2400.
- Printing
Student thin clients do not allow printing.
- Saving Documents
- NEVER save files to your desktop or to My Documents.
- Always save to your H: drive or a flash (pen) drive.
IMPORTANT: Once you log off the thin client student computer the computer will be deleted so it is impossible to retrieve documents you did not save correctly.
- Login Problems
- Erase the previous username and start with a clean typing space.
- Make sure you do not have a space in front of the 1st letter of your username.
- Type the password slowly.
- “Failed to authenticate” - Type the password again
- “Bad username or password”
- Check for typing errors.
- Type the information again slowly
- Power Issues
Is the blue light glowing just below the Samsung label and above the silver bar? If not,
-
- Make sure the power cable is pushed in snugly under the monitor and on the wall.
- *Make sure the toggle switch is turned ON.
-
- Push the ON/OFF button under the silver bar gently to see if the blue light comes on.
- Black Screen/Analog Message
If the screen has a black screen with signal/source lost or analog message going across the screen.
-
- Locate the SOURCE button on the silver bar.
- Gently push the button located under the word source.
- View Connection Error
- Make sure the network cable is plugged into the correct hole under the monitor. See Samsung Thin Client Hookup
- Check to make sure the network cable is plugged in at the wall.
- Check the Configuration settings. See Samsung Thin Client Network Configuration
- Gently wiggle the mouse and wait for the login window to appear.
- Repeat, if needed.
- Black Screen/White Arrow
- Student:
- Wait 2-3 minutes.
- After 2-3 min. call the Help Desk and give the student’s name and ID # .
- Student:
Staff:
- Wait 5-10 min. to allow updates to be installed.
- After 5-10 min., if the computer still does not go to the desktop call the Help Desk 903-446-2400 and have the computer Reset.
- Other Error Messages
- “Display Protocol…”
- “Agent Unreachable…”
- “Blocked by a Firewall…”
- “Domain Contoller…”
Call the Help Desk. 903-446-2400
