Using the Quick Grade Mode
From Longview ISD Technology Wiki
Revision as of 16:35, 24 October 2013 by Patjohnson (Talk | contribs)
Examples
-
- Grading any multiple choice, T/F, Yes/No, short fill-in-the-blank questions.
- Grading assigned math problems from the textbook.
- Grading a math worksheet.
- Grading questions about a reading passage.
Setup
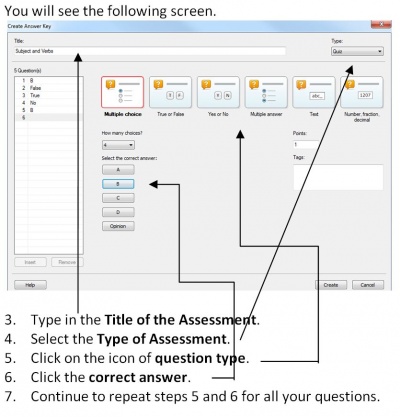
Note: If you select the Text question type, after typing in the correct answer, you click Add.
Note: Enter the title that reflects the actual assignment in your grade book.
(Remember: Maximum # of questions is 40)
- 8. Once finished with selection of questions types and selection of answers, click the Create button in the bottom right hand corner.
- 9. This will create your full assessment in Smart.
Procedures for Starting the Assessment
- 10. Click on the Title page in the Page Sorter.
- 11. Click the Response Tab on the left hand side of your Smart Notebook screen.
- 12. Fill in the Assessment description.
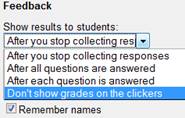
- 13. Select the choice of Feedback to the students.

- 14. Select File > Save As, navigate to the appropriate location for saving.
- 15. Name the file assessmentname_p0 for a master copy of your assessment. *(p for period; 0 for master)
- 16. Double check your answers by clicking Response on the Menu Bar at the top of your window, select Set All Answers. Change any answers necessary and click Done.
- 17. Save copies of your master for each of your classes.saving for other classes, at the bottom of the Set All Answers screen.
Note: If you teach multiple classes of the same subject, while the master assessment is open, you may want to save the assessment for each class.
Select File> Save As. Name the file assessmentname_p1 for your first period class; then File> Save As again. Name the file assessmentname_p2 for your second period class. Continue for each class period.
This gives you a clean assessment for each period.

