Import and Arrange Pictures
From Longview ISD Technology Wiki
(Difference between revisions)
Lferguson (Talk | contribs)
(Created page with '==== Creating A Project ==== :1. Create a folder in your '''H drive''' or on the hard drive of the computer where you are working where all images, music files, and the project…')
(Created page with '==== Creating A Project ==== :1. Create a folder in your '''H drive''' or on the hard drive of the computer where you are working where all images, music files, and the project…')
Current revision as of 13:52, 5 March 2013
Contents |
Creating A Project
- 1. Create a folder in your H drive or on the hard drive of the computer where you are working where all images, music files, and the project will be stored.
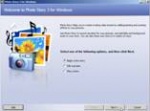
- 2. Click the Start button and select Photo Story 3. You may need to click all programs in order to find it on the list.
- 3. Select Begin a new story and click the Next button.
Importing Pictures
- 1. Click the Import Pictures button and navigate to the picture's location.
- 2. Move the slider at the top right to adjust the size of the thumbnails.
- 3. Double-click the picture you want to use. This will import the picture into Photo Story.
Selecting Multiple Image
- 1. Hold down the Ctrl key and click the thumbnail images you want to include in your Photo Story.
- 2. Click the OK button to import the pictures into the timeline.
- 3. You can always import more pictures at any time as you create your story.


