Virtual Computing Questions
From Longview ISD Technology Wiki
| Line 27: | Line 27: | ||
'''Setting Staff Default Printer''' | '''Setting Staff Default Printer''' | ||
| + | |||
On staff thin clients each staff member must set your own default printer. | On staff thin clients each staff member must set your own default printer. | ||
Revision as of 15:57, 9 January 2013
Samsung Thin Client
Using a virtual thin client computer is basically the same as using a desktop or laptop computer, but, there are a few differences.

Some things to know:
- A Samsung thin client monitor (terminal) is used to access the virtual computer, but, the computer is not physically located in your room.
- Any terminal can be used to access a virtual computer.
- The virtual computers are divided into 3 basic pools of computers:
- Classworks
- Staff
- Students
Staff Computers
Staff members “grab” the same virtual computer each time they log off and back on.
If something goes wrong with a staff VM computer the technology department can simply assign a new one and detach the faulty virtual computer.
Therefore, staff members can:
- Set up the Internet Explorer home page.
- Set their start menu to look a specific way and can add programs to it.
- Be assigned to specific campus printers.
- Staff members have two computer group choices: Classworks or Staff
Setting Staff Default Printer
On staff thin clients each staff member must set your own default printer.
- Click the Start button and then choose the printer icon to view the printer choices you have.
- Right-click on the printer you want to set as you default printer and choose “Set as Default Printer”.
If you do not see a printer in the printer list contact your ITS or call the Help Desk. You will need to know the desired printer identification (name) and location if you call the Help Desk
Samsung Thin Client Network Configuration
Click the word OPTIONS in the upper left corner of the screen.
 Choose CONFIGURATION. Under Configuration a window will come up which will have several tabs across the top.
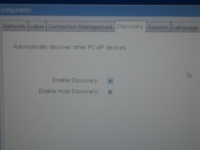
Main tabs to check for configuration: Network Tab, VMWare View Tab, Discovery Tab
Important: if you need to make any changes in the configuration you will need to Reset or Restart the computer. Do whatever it says to do.
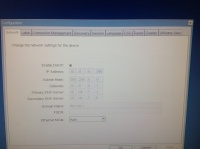
- Enable DHCP: Check.
- IP Address: Will vary. Example: 10.8.4.245
- Subnet Mask: 255.255.0.0
- Gateway: Will vary. Example: 10.8.0.1
- Primary DNS Server: 10.40.7.2
- Secondary DNS Server: 10.40.7.6
- Domain Name: lisd.org
- FQDN: blank
- Ethernet Mode: Auto
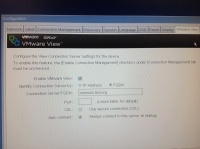
- Enable VMware View:
- Identity connection Server by: FQDN
- Connection Server FQDN: nemesis.lisd.org
- Port: leave blank
- SSL: no check
- Auto connect: check
- Enable VMware View: Check
- Identity connection Server by: FQDN
- Connection Server FQDN: nemesis.lisd.org
- Port: leave blank
- SSL: no check
- Auto connect: Check


