Advanced Features
From Longview ISD Technology Wiki
(→Transitions) |
(→Transitions) |
||
| Line 97: | Line 97: | ||
:1. On the narrate your pictures and customize motion page, click the picture for which you want to select a transition, and then click customize motion. | :1. On the narrate your pictures and customize motion page, click the picture for which you want to select a transition, and then click customize motion. | ||
| - | <div style="float: | + | <div style="float:right;left-padding:.50em;"> |
[[File:transition.jpg|50px]] | [[File:transition.jpg|50px]] | ||
</div> | </div> | ||
Revision as of 17:18, 21 February 2013
Contents |
Edit Pictures
General Editing Tools
In the Import and Arrange Your Pictures title section, note the editing tools found below the preview screen.
Correcting Color Levels
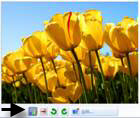
- 1. Click the Correct Color Levels button.
- 2. Note that the Correct Color Levels is now blue. It is now on for this picture.
- 3. If you like how the picture now appears, leave the button on.
- 4. If you don’t like how the picture appears, click the button again to turn it off.
Correcting Red Eye
- 1. Click the picture on the timeline where you need to correct red eye.
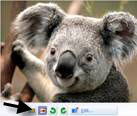
- 2. Click the Correct Red Eye button.
- 3. Note that the Correct Red Eye button is now blue. The tool is now turned on.
- 4. If you like how the picture now appears, leave the button on.
- 5. If you don’t like how the picture appears, click the button again to turn it off.
Rotating Images
- 1. Photo Story 3 works best with images taken in a landscape mode.
- 2. Click Rotate or Rotate Clockwise to correct orientation of image.
Editing Images
- 1. Click the Edit button to make other changes your images.
- 2. Rotate and Crop
- 3. Auto Fix
- a. Correct Contrast
- b. Correct Color Levels
- c. Correct Red Eye
- 4. Add Effect
- 5. Click the green Clockwise or Counterclockwise arrow to change the orientation of the image.
- 6. Under the Auto Fix tab, click the radio button beside the different auto fixes to turn the corrections on or off.
Adding Effects
- 1. Click the Add Effect tab.
- 2. Click the black arrow to the right of effect to see the possible effects.
- 3. Click the effect you want to use.
- 4. Select Apply the selected effect to all of the pictures in your story if you want that effect on every slide.
- 5. Click Save.
- 6. If you are using a different effect on each slide, click Save after you change the effect on each slide.
- 7. Use the arrows to navigate to different slides.
- 8. Click Save Project to save all your editing changes to the project file.
General Cropping Information
-
- Photo Story 3 works best with images taken in landscape format. If changing the orientation of a picture is required, you should rotate the image before cropping it.
- You can edit your pictures by cropping the picture to keep only the portion that you want to use. Photo Story automatically adjusts the width or height to maintain a 4:3 aspect ratio for the picture.
- If you use a very small area of the image, the resulting picture may be blurry.
- You can also crop your pictures by right-clicking a picture in the film strip, pointing to Edit, and then clicking Crop. Then follow the steps in the next section.
- Cropping a picture does not affect the original picture.
- Clearing the crop check box removes the cropping for the selected picture.
- Clicking the reset button in the edit pictures dialog box discards all edits of the selected picture made on all of the tabs in the edit pictures dialog box.
- You can edit your pictures on any page in Photo Story on which the film strip appears by right-clicking a picture, pointing to edit, and then clicking the option you want.
Cropping Images
- 1. On the Import and arrange your picture page, click an image.
- 2. Then, click the Edit button found beneath the preview image.
- 3. Click the Rotate and Crop tab.
- 4. Select the Crop check box.
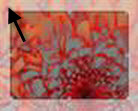
- 5. A rectangle with handles appears on the image.
- 6. To resize the rectangle, point to a side or corner. When the cursor changes to a double-headed arrow, drag the handle.
- 7. To move the entire rectangle, point to the center of the rectangle. When the cursor changes into a 4-headed arrow, drag the rectangle to the image area you want to keep.
- 8. Click save.
- 9. To crop another image, click the Go to next picture button or the Go to previous button until you reach the image you want to edit.
- 10. Repeat steps 6 – 9 until you have cropped all images that you want to change.
- 11. When you are done cropping, click Close to close the edit pictures dialog box.
Customize Images and Transitions
Transitions
By default, transitions are inserted between pictures in your story. You can specify the number of seconds a transition will display or you can let Photo Story set the duration automatically.
- 1. On the narrate your pictures and customize motion page, click the picture for which you want to select a transition, and then click customize motion.
- 2. Click the transition tab.
- 3. If necessary, select the start current picture using a transition check box.
- 4. In the transitions box, click a transition.
- 5. If you want to specify the number of seconds the transition will be displayed when your story is played, select the number of seconds to display the transition option, and then type or select the number of seconds you want the transition to display.
- 6. Click save to save the motion and duration changes you made.
- 7. To preview your story with the transitions, click preview.
- 8. When you are done selecting transitions for the pictures in your story, click close.
Customize Motion
- 1. On the narrate your pictures and customize motion page, click the picture for which you want to specify the motion, and then click customize motion tab.
- 2. In the customize motion dialog box, select the specify start and end position of motion check box. A rectangle with handles appears on the picture in the start position and end position boxes.
- 3. In the start position box, do one or both of the following:
- a. To resize the rectangle, point to a side or corner of the rectangle. When the cursor changes into a double-headed arrow, drag the handle.
- b. To move the whole rectangle, point to the center of the rectangle. When the cursor changes into a four-headed arrow, drag the rectangle to the area of the picture that you want to receive focus when the picture first appears in your story.
- 4. In the end position box, repeat the previous 3a and 3b steps.
- 5. If you want the motion for the selected picture to start where the motion for the previous picture ended, select the set start position to be the same as end position of the previous picture check box.
- 6. Moving the rectangles clears the check box.
- 7. If this picture does not have narration and you want to specify the number of seconds it will be displayed when your story is played, select the number of seconds to display the picture option, and then type or select the number of seconds you want the picture to display.
- 8. Click save to save the motion and duration changes you made.
- 9. To preview the panning and zooming effects, click preview. When you are done customizing the panning and zooming motion for the pictures in your story, click close.
Background Music
General Information
You can add background music that plays during your story. A different piece of music can play for each picture or for a group of pictures. You can add as many pieces of music to a story as there are pictures in the story. You can add multiple songs from your computer or my music folder to your story. You can add as many songs as there are pictures in your story and Photo Story plays each song for as long as the picture is displayed in your story.
Pay close attention to copy right laws.
The picture you select is the anchor image, and indicates where you want the music to start playing. The anchor image is indicated by a musical note displayed beneath the picture in the film strip. The music you select plays until one of the following events occurs:
-
- The music ends.
- An anchor image that specifies a new piece of music be played is encountered.
- The story ends.
You can replace a piece of music for an anchor image by selecting a different piece of music or by dragging a music file onto the anchor image in the film strip.
If the anchor image is deleted from the story, the music and any other customizations associated with the anchor image are also deleted from the story. When you add background music to your story, a music strip appears above the film strip. The music strip displays the name of each piece of music that is added to your video story. The music strip is color-coded for each piece of music in the story. Photo story automatically adjusts the amount of time a piece of music will play in your story when any of the following occurs:
-
- A picture is added to a group of pictures.
- A picture is deleted from a group of pictures.
- A picture is moved to a different place in the story.
- Another piece of music is added to the story.
- The story ends.
For example, suppose that a piece of music is long enough to play while four pictures are displayed in your story. If you select another piece of music to play starting at the third picture in the original group of pictures, the first piece of music will automatically stop playing when the third picture is displayed in your story.
If you select a piece of music that is shorter than the picture duration in your story, the music will end before the picture is completely displayed. If you want background music to play for the entire picture duration, you can do one of the following:
-
- Reduce the picture duration.
- Reduce the amount of narration.
- Select a longer piece of music.
If you select a piece of music that is shorter than the duration of a group of pictures in your story, the music will end before the group of pictures is completely displayed. If you want background music to play while all the pictures in the group are displayed, you can do the following:
-
- If you specified duration for the pictures, reduce the amount of time each picture in the group is displayed.
- If you narrated some or all of the pictures, reduce the amount of narration for the group of pictures.
- Loop the piece of music by adding it to the picture in the group where it ended
- Select a longer piece of music.
Notes The Add background music page also enables you to display information about a selected piece of music, set the volume for a piece of music, and preview your story.
Selecting Music
- 1. Only one piece of music can play for a selected picture or anchor image.
- 2. On the add background music page, click a picture. Click select music.
- 3. In the open dialog box, locate the music you want to add, and then click open. The music file can be in Windows Media Audio (WMA), MP3, or WAV format.
- 4. Repeat steps 2 and 3 until you have selected all the music that you want to play with your story.
- 5. Click preview to play your story. Your entire story plays, starting at the selected picture, complete with the narration, title pages, and any background music you added.
- 6. If you need to adjust the volume of a piece of background music in your story, select the anchor image, and then move the volume slider on the add background music page.
- 7. You can also change the music in your story by right-clicking a picture on the film strip on the add background music page, pointing to music, and clicking select, create, or delete
Creating Music
- 1. Click the Create Music button.
- 2. Choose a Genre.
-
- All
- Classical
- Country
- Dance
- Funk
-
- 3. Choose a Style.
- 4. Choose Bands and Moods
- 5. Change Temp slider.
- 6. Select Intensity.
- 7. Click the Play button to hear the creation.
- 8. Click Ok.


