Samsung Thin Client Hookup
From Longview ISD Technology Wiki
(Difference between revisions)
| Line 12: | Line 12: | ||
<br> | <br> | ||
[[File:ThinClientPowerPlug.jpg|150px|Power Plug]] | [[File:ThinClientPowerPlug.jpg|150px|Power Plug]] | ||
| + | |||
| + | ==Speakers == | ||
| + | * Speaker Bar – Is attached either on top of the monitor or is placed under the monitor. | ||
| + | * Speaker wires - Plug them into the side of the monitor. | ||
| + | ** Green audio plug into green hole | ||
| + | ** Black USB plug into one of the USB ports located close to the green audio plug. | ||
Revision as of 16:51, 9 January 2013
Cable Connections
- Remove the key at the base of the thin client. (May not have one.)
- Raise the monitor.
- Rotate the monitor sideways for ease of access to the connections.
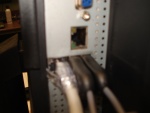
- Plug in the network cable, mouse & keyboard – in a straight line as pictured.
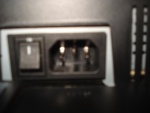
- Plug the power cable snuggly into this hole. Located on the bottom of the monitor.
- The toggle switch should be in the ON position (as shown).
- Rotate the monitor back to the correct position, making sure the power plug is not pulled out.
Speakers
- Speaker Bar – Is attached either on top of the monitor or is placed under the monitor.
- Speaker wires - Plug them into the side of the monitor.
- Green audio plug into green hole
- Black USB plug into one of the USB ports located close to the green audio plug.


